What do you need help with?
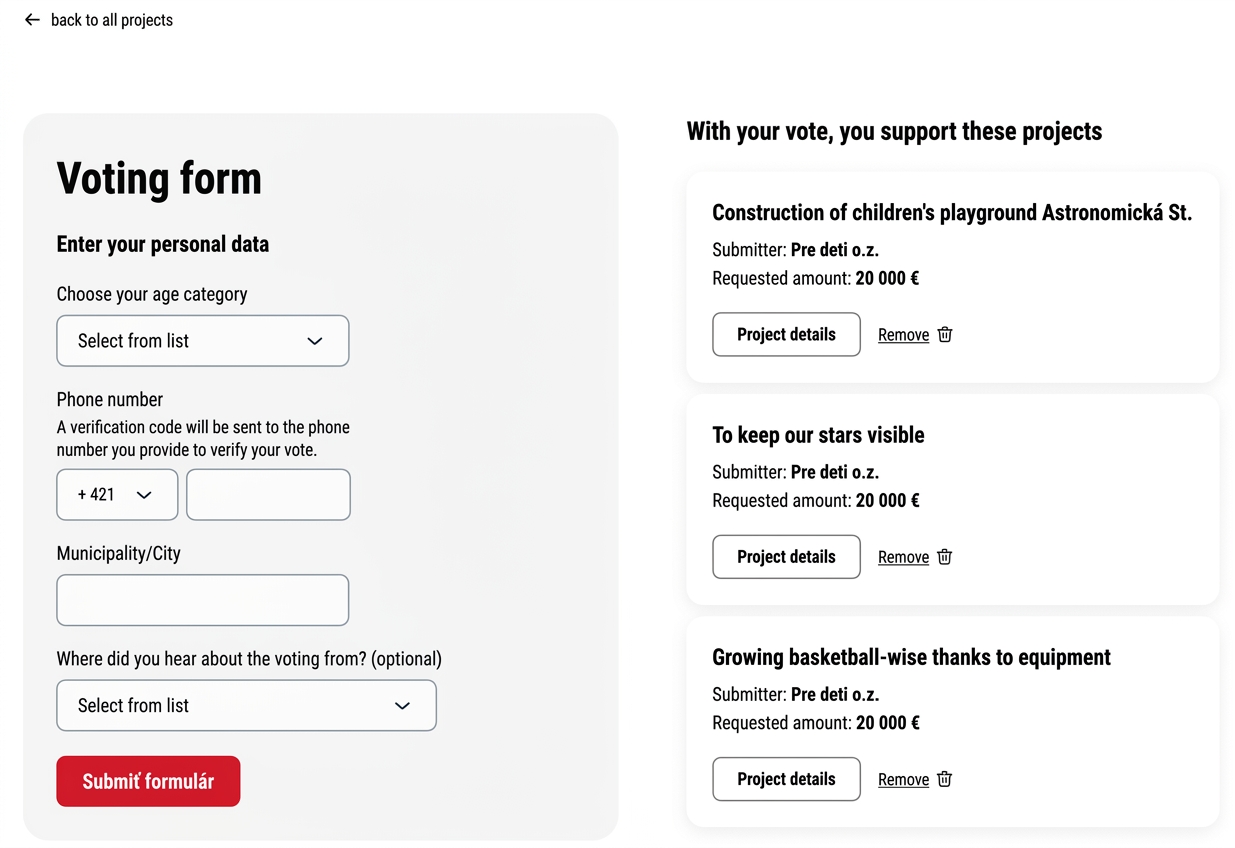
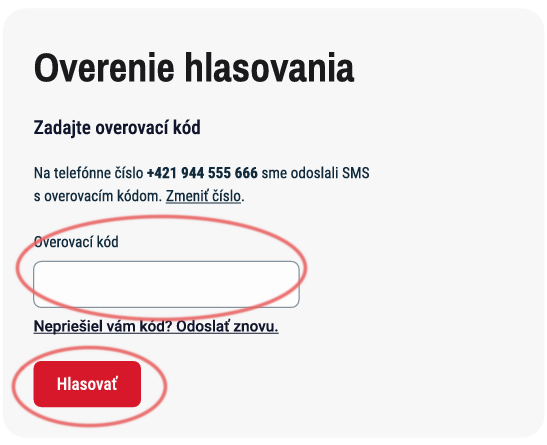
-
Overview and settings
-
Forms
- Manuals will be coming soon.
-
Management of applications
-
Evaluation and approval
-
Contracts and other documents
-
Exports
-
Participatory budget
The public can vote for projects on the voting page from the moment voting starts until it ends.
On this page, the public will find projects that you have moved to voting, basic information about the project, and its brief description.
Voting is done via an SMS code that is automatically generated and sent to the phone number provided by the voter in the voting form.
Voting starts and closes automatically, according to the deadline you specified in the "Voting settings".
Voting page is automatically displayed when voting starts.
After voting ends, the voting results page.
Voting page
-
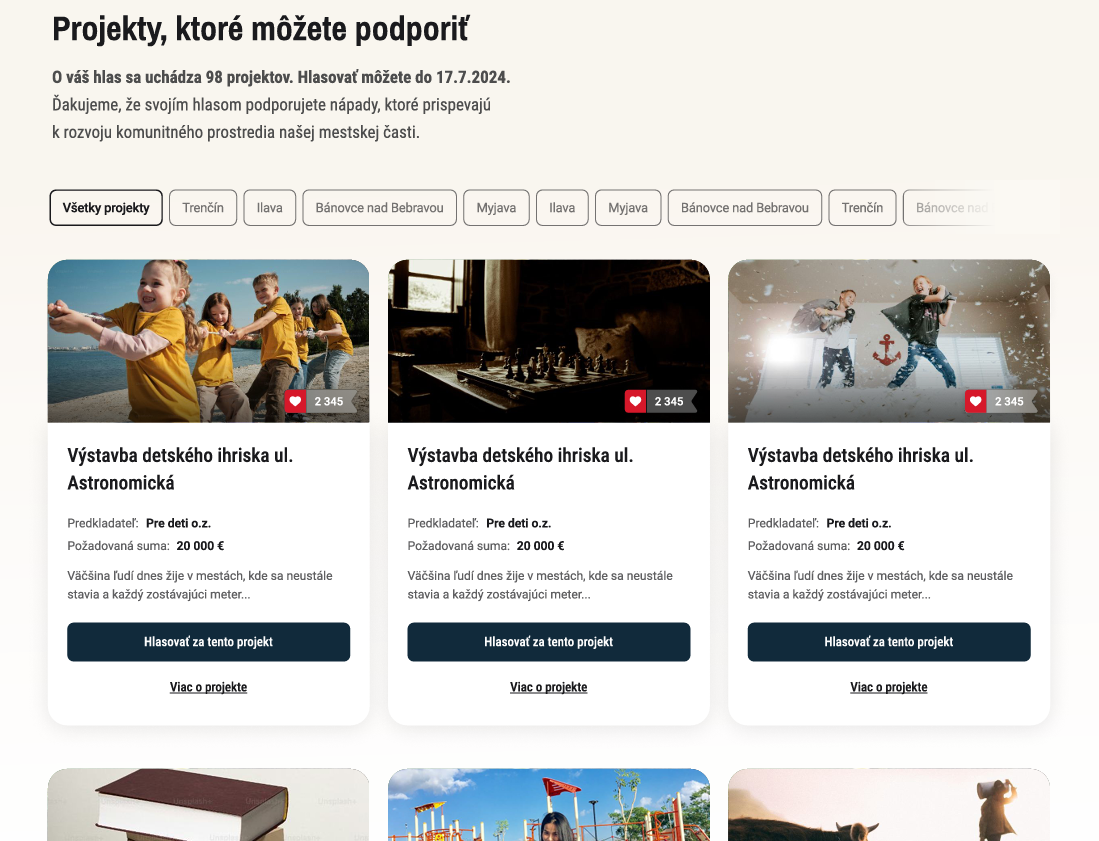
If you have created separate programmes e.g. for individual districts (or a separate programme for projects and another for assignments), voters can filter them by clicking the button of the specific programme (in this example, the district).
-
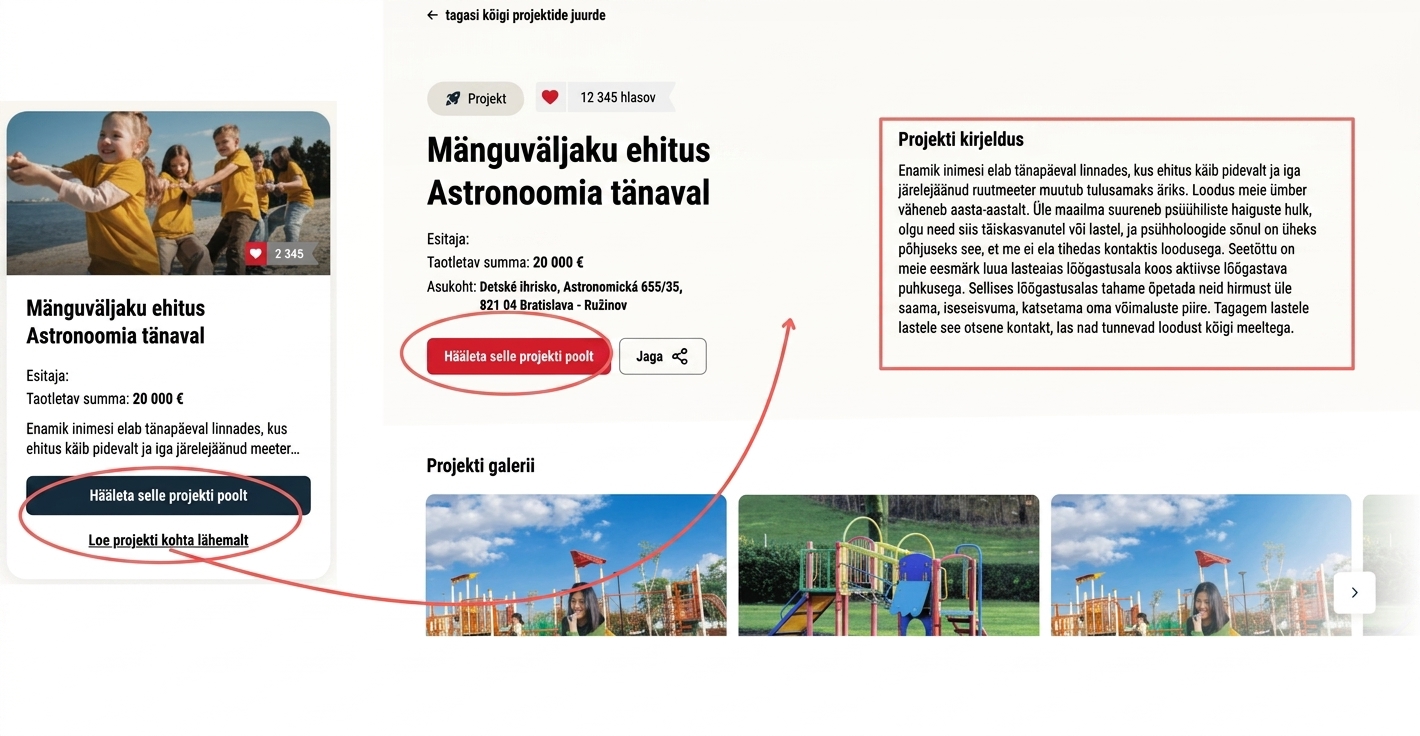
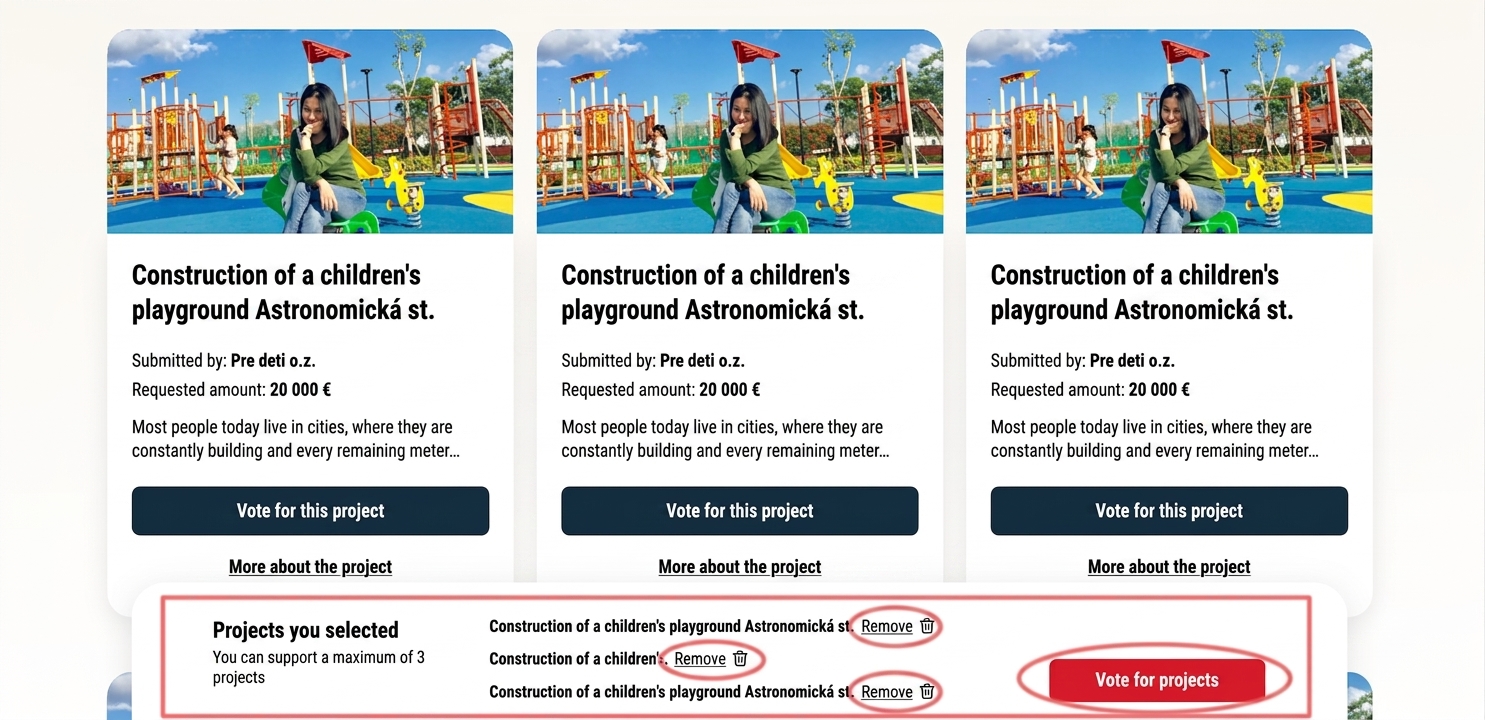
Further down the page, the voter will find a list of projects that you have moved to voting.
Each project is displayed with an illustrative image and basic information: project name, applicant name, requested amount, and optionally the location.
This information and image are pulled from the application form, and to display them on the page the tags in the „Settings“ tab at the programme level must be filled in correctly („project name tag“, „project applicant tag“, „requested resources tag“, „location tag“, „image tag“). -
In the bottom right corner of the image, the current vote count.
You can enable/disable the display of the vote count in the „Voting settings„. -
The voter selects the project they want to vote for by clicking the „Vote for this project„.
-
If the voter wants to view a brief annotation of the project, they click the „More about the project„.
This information is also pulled from the application form, and to display it on the page the „annotation tag“ field in the „Settings“ tab of the programme must be filled in correctly.
Voting procedure
1 Select one or more projects
In the first step, the voter selects the project (or multiple projects) they want to vote for by clicking the "Vote for this project".
(You can determine how many projects one voter can vote for in the "Voting settings".)
If they want to view a brief description of the project first, they click the "More about the project".
A page with the project details and the description provided by the applicant in the form will open.
If they want to select this project, they click "Vote for this project".
2 Voter's selected projects
After clicking the "Vote for this project" button, a bar with the list of selected projects.
If you have allowed voting for more than one project, the voter selects the next project by also clicking the "Vote for this project" button.
The voter can also remove a project from the list of selected projects by clicking the "Remove".
If the voter is satisfied with the list of selected projects, they click the "Vote for projects".
3 Voting form
After clicking the "Vote for projects" button, the voting form page.
On the left side of the page is the voting form, where the voter fills in their details (depending on the type of form you selected in the "Voting settings") and a phone number for sending the verification code.
On the right side the voter can see the list of projects they want to vote for. Projects can be removed from the list by clicking the "Remove" link, or the voter can view more information about the project by clicking the "Project detail".
If the voter is satisfied with the list of selected projects, they can click the "Submit form".
4 Voting verification
After clicking the "Submit form" button, the voting verification is displayed, where the voter enters the verification code.
This code is automatically sent via SMS message to the phone number provided in the voting form.
The voter confirms their vote by clicking the "Vote".