Print

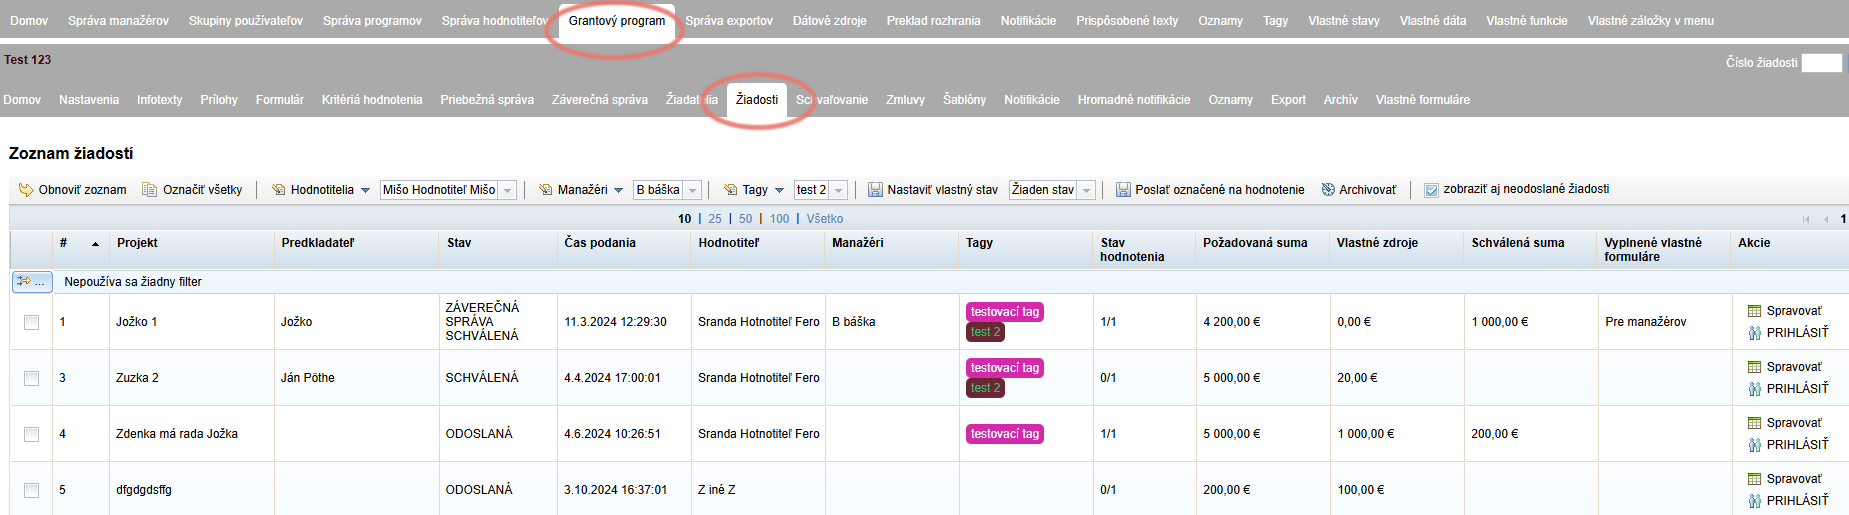
Application overview

The „Applications“ tab

You can find the list of all applications received in the programme in the „Applications“ tab in the menu at the programme level. Within this tab you can view and work with applications from the moment an application is in progress until its final settlement:

  • You can view and check applications.
  • You can also log in as a specific applicant.
  • You can assign applications to a manager/managers.
  • You can label individual applications with a tag.
  • You can view completed custom forms (e.g. request for change).
  • You can write a note for the application.
  • You can return the application for completion.
  • You can assign applications to evaluators and send them for evaluation.
  • You can view all related items associated with a specific application (evaluation, contract, settlement…).
  • You can manually change the status of the application.
  • You can download a specific application in PDF format or export it as an Excel document.
Tip

Regardless of which tab at the programme level you are currently on, you can open the menu at the level of a specific application by entering the application number in the field in the upper right corner and clicking the "GO" button.Otvoriť žiadosť podľa čísla žiadosti

List of applications

Tip

If you want to display unsubmitted applications in the list as well, check "show unsubmitted applications" above the table on the right.
Zobraziť aj neodoslané žiadosti

In the overview table in the „Applications“ tab you will find the following application data displayed in columns:

Zoznam žiadostí
  1. Application number (#) – generated automatically in the format 1, 2, 3, etc., unless you have created a custom template for application numbering in the „Settings“ tab at the programme level.
  2. Project name (Project) – for correct display, make sure to fill in the „project name tag“ (the tag of the application form field where the applicant enters this information) in the „Settings“ tab at the programme level.
  3. Applicant name (Applicant) – for correct display, make sure to fill in the „project applicant tag“ (the tag of the application form field where the applicant enters this information) in the „Settings“ tab at the programme level.
  4. Status – current status of the application
  5. Submission time – date and time the application was submitted. If the application was reopened and returned to the applicant for completion and then resubmitted, this column will always display the date of the original submission.
  6. Evaluator – the name of the evaluator(s) to whom you assigned the application for evaluation.
  7. Managers – the name of the manager(s) you have assigned to the application.
  8. Tags – this column displays all tags (labels) you have assigned to the application.
  9. Evaluation status – a number representing the count of evaluators who have already evaluated the application out of the total number of evaluators assigned to evaluate it (e.g. 3/5).
  10. Requested amount – for correct display of this amount, make sure to fill in the „tag for requested resources“ (the tag of the application form field where the applicant enters this information) in the „Settings“ tab at the programme level.
  11. Own resources – for correct display of this amount, make sure to fill in the „tag for own resources“ (the tag of the application form field where the applicant enters this information) in the „Settings“ tab at the programme level.
  12. Approved amount – this column displays the amount specified for the given application in the „Approval“ tab at the programme level.
  13. Completed custom forms – if you have created and made available to applicants any additional forms (e.g. request for change, etc.), the names of those additional forms submitted by the applicant will be displayed here.
  14. Actions – in this column you will find the buttons:
    • Manage“ – opens the menu at the application level where you will find everything related to this application and can continue working with it.
    • LOG IN“ – if you have the „impersonation“ permission, clicking this button will log you into the system as this applicant. (To log back in as a manager, click the „Log in as original user“ link in the upper right corner of the screen.)

Table display settings

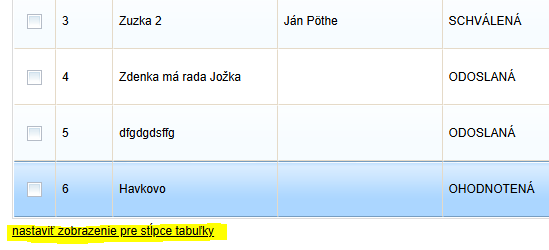
Column count settings

Below the table you will find the „set display for table columns“ link. Here you can set which table columns you want to have displayed or hidden.

Zobrazenie stĺpcov tabuľky

The following settings in the „Settings“ tab at the programme level are important for correct data display:
Project name tag – for correct display of project names in the „Project“ column.
Project applicant tag – for correct display of the applicant name in the „Applicant“ column.
Requested resources tag – for correct display of the amount in the „Requested amount“ column.
Own resources tag – for correct display of the amount in the „Own resources“ column.

These data depend on the application form you have created – you need to enter the field tag in the form where each of these data items is located.
When entering these tags in the settings, you can use the document icon at the end of the row. Clicking it will expand the entire tree structure of the application form – find the desired field and click it to insert the tag into the row.

Tagy pre zobrazenie údajov z formuláru v zozname žiadostí

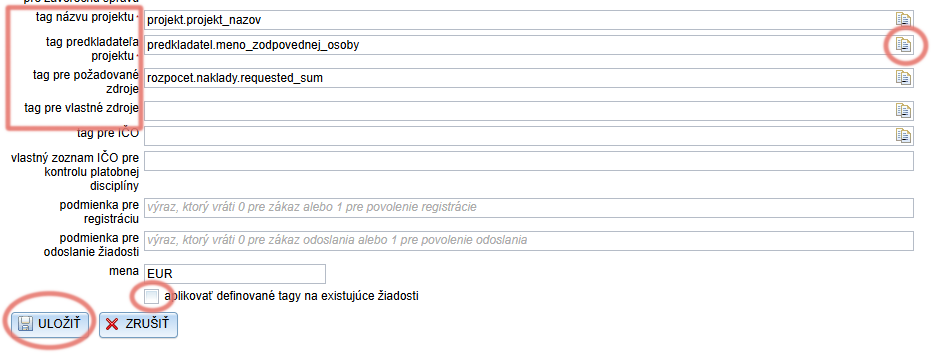
Whenever you edit any of these tags, before saving changes check „apply defined tags to existing applications„.
If you do not check this option, the data of already received applications will continue to be displayed in the table according to the previous settings.

Table of Contents
×