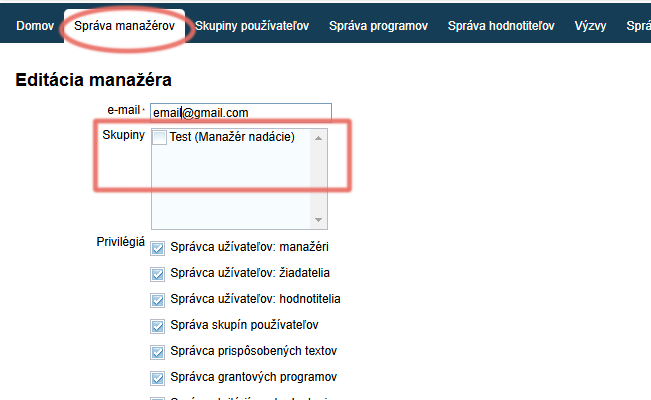
Access for a manager
You can create access for a new manager or edit access for existing managers in the “Správa manažérov” tab in the main menu at organisation level.
Create a manager
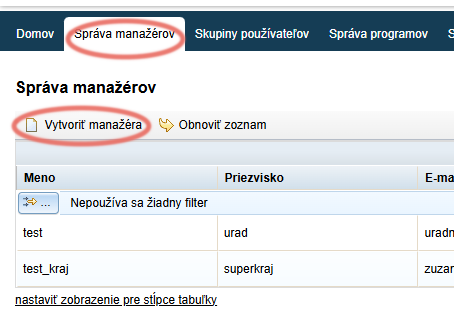
In the “Správa manažérov” tab, click the “Vytvoriť manažéra” link.
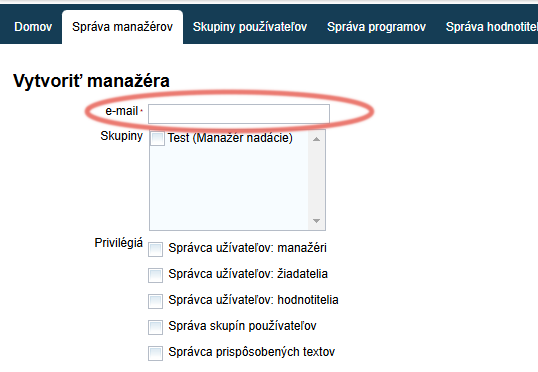
Manager’s email
Fill in the manager’s email.
Privileges
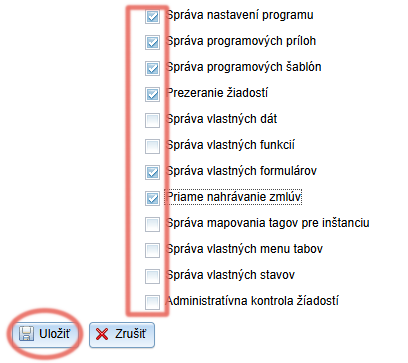
Tick the privileges you want this manager to have and then click the “Uložiť” button at the bottom of the screen.
- In the “Skupiny používateľov” tab in the main menu, you can create groups for which you define a specific combination of these privileges and then simply assign a group from the list to the manager. You can then skip the step of ticking individual privileges for the new manager.
Completing the registration
At this moment, a notification with a link to complete the registration has been sent to the email you entered when creating the access.
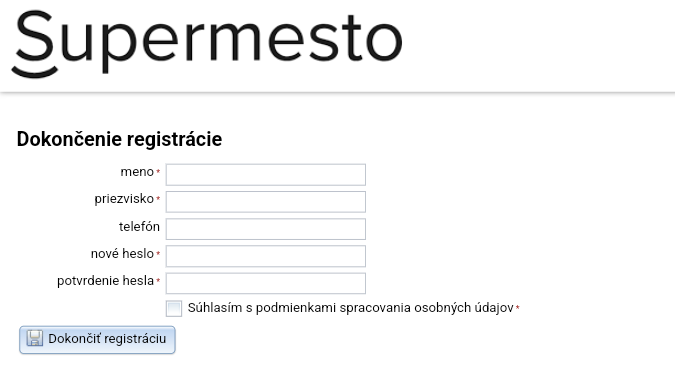
After clicking this link, the manager fills in their name, creates a password and clicks the “Dokončiť registráciu” button. They will then log in to the system with this email and password.
Edit a manager
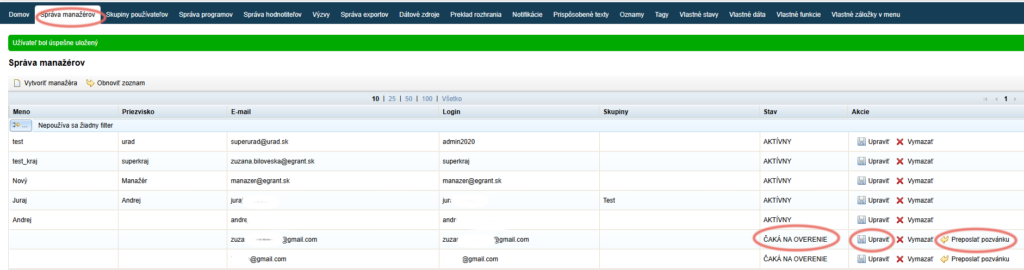
In the “Správa manažérov” tab in the main menu, you can see a list of all created accesses.
In the “Stav” column, you can also see whether the account is already active. “ČAKÁ NA OVERENIE” means that the manager has not yet completed the registration.
In the “Akcie” column, you can resend the invitation to complete the registration by clicking the “Preposlať pozvánku” link. By clicking the “Upraviť” link, you can change their email (e.g. if you made a mistake in the email address).
Attention!
You have now created an account for the new manager. For them to have access to programmes, you must assign them to a specific programme in the “Správa programov” tab in the main menu.
If a manager has several roles
If a manager has several roles within one entity (they also have an account as an evaluator/applicant under the same email), no invitation is sent after their email is entered, and their manager account is immediately displayed in the table as “AKTÍVNY”.
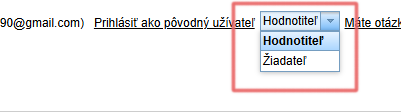
To log in, they will use the login details (email and password) of the previously created account, and after logging in, they will switch between the individual roles in the top right-hand corner of the screen.
User groups
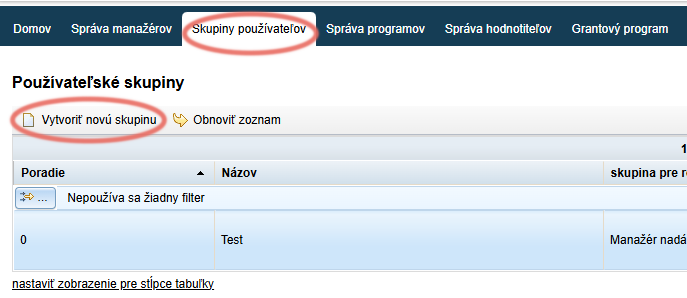
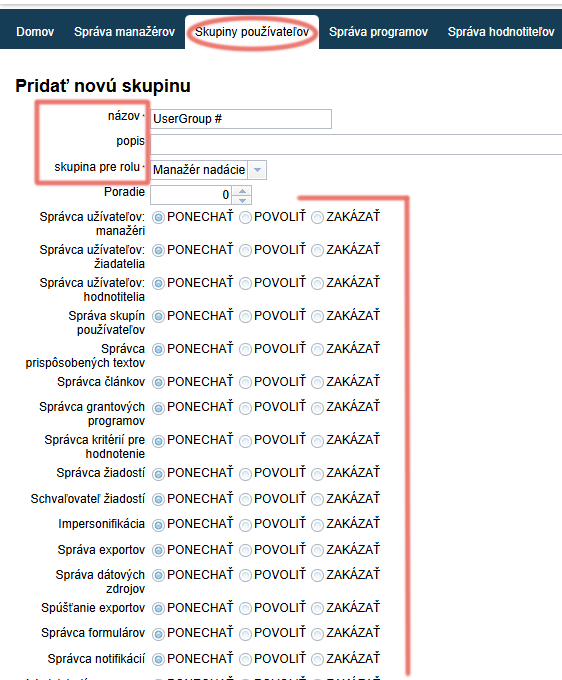
In the “Skupiny používateľov” tab in the main menu, you can define different combinations of privileges for managers (groups). You can then assign individual managers to these groups and thus set their privileges with a single click.
Create a new group
In the “Skupiny používateľov” tab, click the “Vytvoriť novú skupinu” link.
Group settings
Choose a name for this group and, optionally, a description.
In the “skupina pre rolu” row, select “Manažér nadácie”.
Set the privileges for this group:
- “PONECHAŤ” keeps the setting specified in the individual manager’s account (i.e. in this group, this privilege will follow the individual settings of each manager).
- If the group contains managers for whom no privileges were ticked when their account was created, and this group has all privileges set to “Ponechať”, these managers will have no privileges.
- If the group contains managers for whom no privileges were ticked when their account was created, and this group has all privileges set to “Ponechať”, these managers will have no privileges.
- “POVOLIŤ” means that all managers in this group have this privilege enabled, regardless of whether you have enabled this privilege for them in their individual account.
- “ZAKÁZAŤ” means that all managers in this group have this privilege disabled, regardless of whether you have enabled this privilege for them in their individual account.
Remember to click the “Uložiť” button at the bottom of the screen.
Assigning a manager to a group
You can then assign a manager to a group created in this way in the “Správa manažérov” tab.
Simply tick the group to which you want to assign the manager – either directly when creating a new manager or, for an existing manager, via the “Upraviť” button (in the list of created managers).